

April 30, 2018
Dryer Repair
Auto dry on your LG dryer model DLE3170W is a convenient feature that takes the guessing game out of selecting dry times for your laundry. Unfortunately, when your appliance begins to experience issues while on auto dry, such as, over-drying your clothes or turning off before your clothes are dry, the moisture sensor bar has most likely malfunctioned. Luckily, replacing the sensor is not complicated, meaning you can probably take on this dryer repair yourself. To help you get started, we’ve provided easy to follow directions below.
How to Replace the Moisture Sensor Bar in Your Dryer
Before you get started, unplug your dryer or turn the circuit breaker off. Gloves and eye protection should be worn while performing all appliance repairs.
-
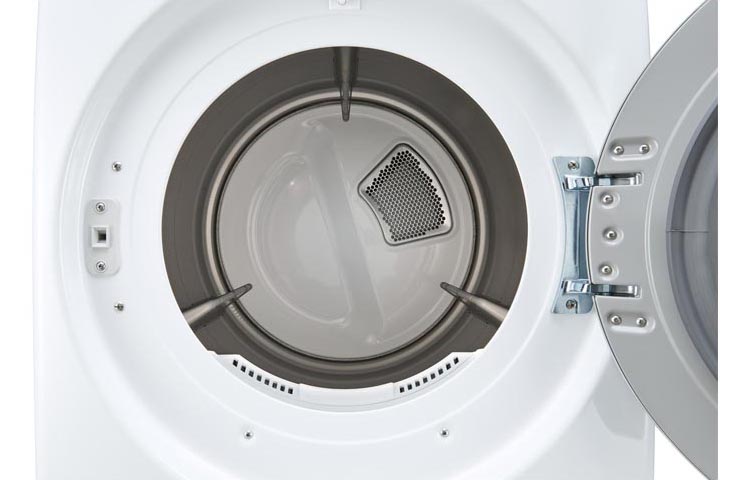
The moisture sensor bar is located just inside the dryer door on the grill that houses the lint screen. To begin, take the lint screen out of the dryer.
-
Next, with a Philips screwdriver, loosen and remove the three screws holding the grill in place. Once you have put the screws in a safe area, carefully detach the grill.
-
Using your Philips screwdriver, take out the two screws holding the moisture sensor assembly in place. Gently pull the sensor assembly out until you see two wires. Disconnect both wires. Now you can completely remove the moisture sensor assembly from your dryer.
-
In the assembly, you will see two moisture sensor bars. The sensor bars are sold separately, so if you need to replace both of them, make sure you buy two new ones; otherwise, you won’t be able to complete your repair. To begin removing the defective parts, turn the assembly over. On the back, you will see two small tabs. Push on one of the tabs with a flat head screwdriver. As you are pressing on the tab, push it down and halfway through the hole it sits in. Then turn the assembly over and use your screwdriver to get underneath the moisture sensor bar to pry it completely from its housing. Repeat the same process if you are also replacing the second bar
-
Before putting in the new bars, take a clean cloth and wipe down the assembly.
-
To install the new moisture sensor bars, first, insert the non-tab side into the housing and then push the tab through the hole on its end. You should hear a click once it is securely in place. Repeat the process with your second sensor bar, if needed.
-
Now that your new moisture sensor bars are in place, you can reinstall the assembly in your dryer. To start, reconnect the two wires and then reattach the screws you removed earlier. Next, snap the grill back into your dryer and reinstall the screws to hold it in place. Finally, put the dryer lint screen into its housing.
-
Plug your dryer in or turn the circuit breaker back on, and enjoy your newly repaired auto dry.

Apr. 09, 2024
How to Clear E24 Error on Bosch Dishwasher

Mar. 06, 2024
Samsung Dryer Not Heating Properly? (5 Fixes)

Feb. 05, 2024
Why Is Your Mini Fridge Not Cooling? (5 Potential Reasons)

Jan. 03, 2024
How to Fix Samsung Washer Error Code 4C

Dec. 11, 2023
How to Resolve UE Error Code on your LG Washer

Nov. 06, 2023
LG Washing Machine Error Codes: How to Fix Them

Oct. 02, 2023
How to Unlock LG Oven Door (After Self-Cleaning)

Sep. 08, 2023
How to Fix LG Washer DE Error Code

Jul. 31, 2023
Why Your Microwave Is Not Working

Jul. 19, 2023
The Quick Guide To Using a GE Self-Cleaning Oven

Jun. 13, 2023
How to Clean Your Dishwasher with Vinegar

May. 08, 2023
How to Fix a Noisy Refrigerator

Apr. 10, 2023
How to Remove Frost Build-up from the Freezer

Mar. 14, 2023
5 Ways To Clean Your Microwave Naturally

Feb. 01, 2023