

May 14, 2020
Dishwasher Repair
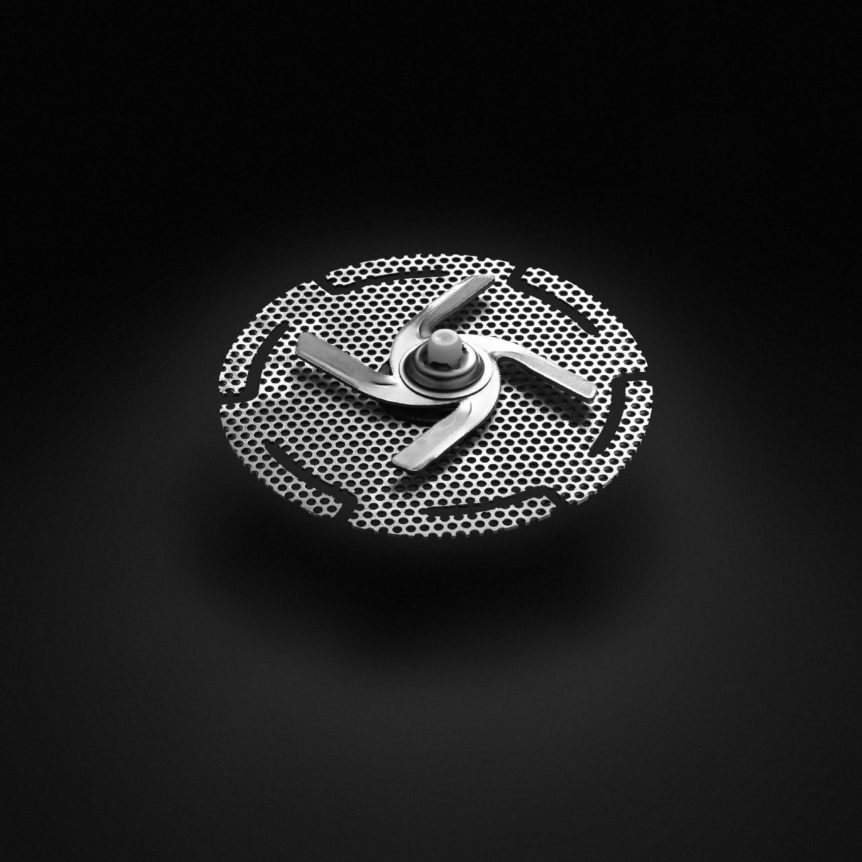
The chopper assembly in your KitchenAid dishwasher model KUDS01JWHO has the important job of cutting up the food particles left in your appliance. This action prevents bits of food from passing into the dishwasher pump, which can cause a serious clog. Signs of a malfunctioning chopper assembly are draining issues, dishes left dirty after a cycle and excessive noise. If the chopper assembly in your dishwasher is failing, please follow the replacement directions provided below.
Appliance Repair Safety Tips
- Always start a dishwasher repair by unplugging your appliance and turning off its water supply.
- Work gloves and safety goggles are a must wear while replacing your dishwasher’s faulty chopper assembly.
- If you don’t feel confident you can safely complete a repair, please stop what you are doing and contact an appliance repair expert.
How to Replace the Chopper Assembly in Your KitchenAid Dishwasher
- Open your dishwasher door and take out your appliance’s lower dish rack.
- Disengage the locking tab on the water supply tube while rotating the bottom half of the tube clockwise. Then, pull out the lower spray arm and the bottom of the water supply tube.
- Using a Phillips screwdriver unthread the screws securing the lower wash arm support assembly and its filter, and then lift the assembly up and out of your dishwasher.
- On the sump assembly, unthread the screw that secures the foreign object protector to the assembly. Next, lift the protector up and out of your appliance.
- Now take out the screw that holds down the pump inlet protector, and then take the protector off the sump assembly.
- Under the pump inlet protector, you’ll find the chopper assembly. To remove the chopper, insert a flat-head screwdriver behind the chopper blade and push the blade forward to release the assembly’s central pin. Next, pull the chopper assembly off its shaft.
- Take your new chopper assembly out of the box and start the installation process by placing the more narrow side of the chopper screen into sump pump housing first. Next, insert the chopper assembly onto the motor shaft. To lock the chopper in place, use a screwdriver to rotate the part’s central pin.
- Now it’s time to put your dishwasher back together. To start, reinstall the pump inlet protector and the foreign object protector.
- Next, replace the lower spray arm support assembly and secure it with the screws you took out earlier, and then reinsert the lower spray arm and the bottom half of the water supply tube.
- To finish up, reinsert the lower dish rack and close your dishwasher door.
If your dishwasher’s chopper assembly did not solve your appliance issue, please contact us today and we’ll be happy to help you diagnose and fix your dishwasher’s malfunction.
May. 06, 2024
Whirlpool Fridge Water Not Working, but Ice Is? Here’s Why

Apr. 09, 2024
How to Clear E24 Error on Bosch Dishwasher

Mar. 06, 2024
Samsung Dryer Not Heating Properly? (5 Fixes)

Feb. 05, 2024
Why Is Your Mini Fridge Not Cooling? (5 Potential Reasons)

Jan. 03, 2024
How to Fix Samsung Washer Error Code 4C

Dec. 11, 2023
How to Resolve UE Error Code on your LG Washer

Nov. 06, 2023
LG Washing Machine Error Codes: How to Fix Them

Oct. 02, 2023
How to Unlock LG Oven Door (After Self-Cleaning)

Sep. 08, 2023
How to Fix LG Washer DE Error Code

Jul. 31, 2023
Why Your Microwave Is Not Working

Jul. 19, 2023
The Quick Guide To Using a GE Self-Cleaning Oven

Jun. 13, 2023
How to Clean Your Dishwasher with Vinegar

May. 08, 2023
How to Fix a Noisy Refrigerator

Apr. 10, 2023
How to Remove Frost Build-up from the Freezer

Mar. 14, 2023