

May 27, 2020
Washer Repair
Has your washer been overfilling when it runs a cycle? Do you disconnect the power in a panic only to find that it is still filling? Well, first things first, shutting off the water at the disconnect will solve your immediate problem, but the bad news is that you will probably need to make a repair.
When a washer starts to overfill, there are typically two problems that cause it. The first is an issue with the water inlet valve. However, if that checks out, then it is a problem with the water level switch, also referred to as a pressure switch.
When working as designed, the water level switch in your washer will detect when there is enough water inside the drum for the desired load size. If this mechanism is clogged or faulty, it may not make the proper detection, which can result in overfilling.
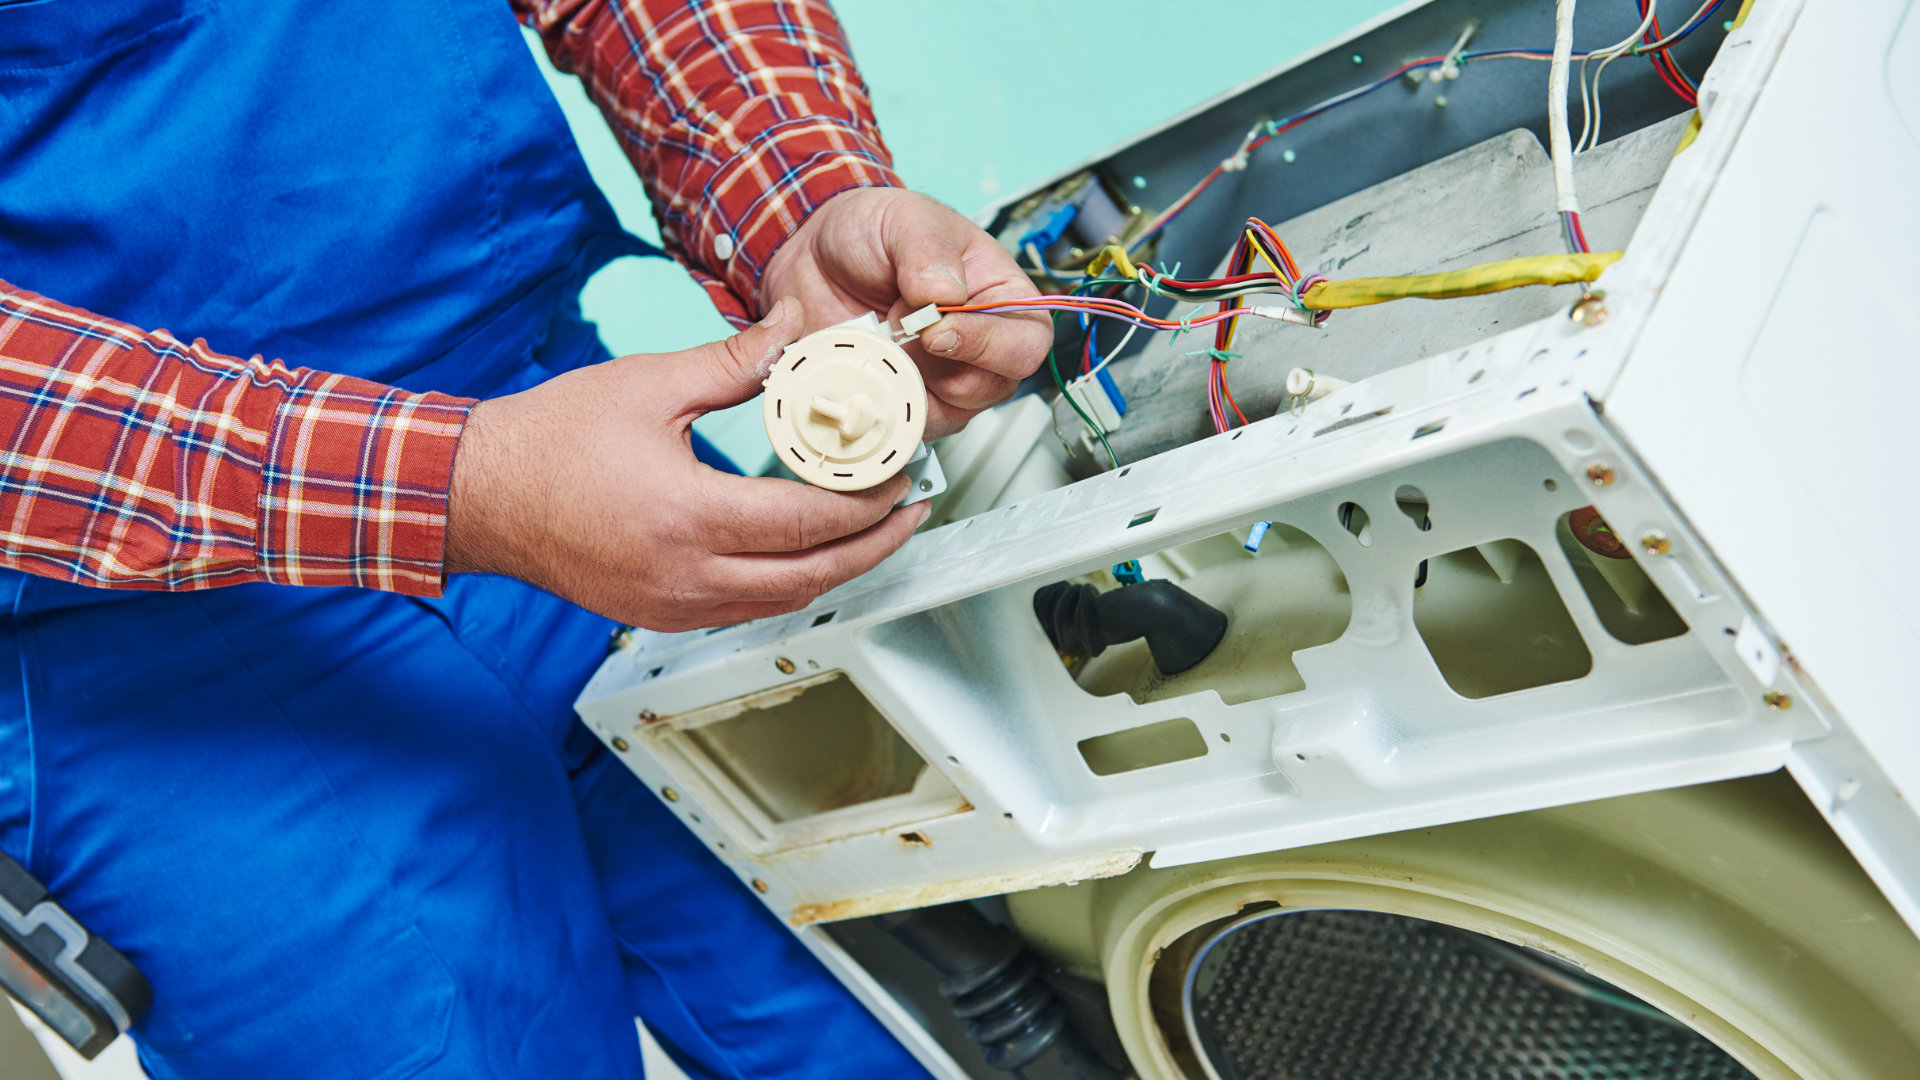
To begin this repair, start by disconnecting the washer from the water and power. You will also want a little room to access the back of the washer or at least be able to reach the screws that secure the control panel.
Once your preparations are complete, start by removing the load selection knob on the control panel of your washer. The pressure switch is the part behind this knob, so the other control knobs can stay on. Next, remove the screws that secure the control panel. Pulling forward on the front of the panel after that is done should cause it to open up like a car hood.
Now you will want to pry the pressure control switch lightly with a Flathead screwdriver. You can then twist it clockwise and it will come out.
Before installing the new pressure control switch, make sure the tube that attaches to the switch looks unclogged before removing. Installing the new pressure switch is simple providing you can line it up correctly so that it twists back into place. After reconnecting the tub, your can reassemble your washer and test it.

Apr. 09, 2024
How to Clear E24 Error on Bosch Dishwasher

Mar. 06, 2024
Samsung Dryer Not Heating Properly? (5 Fixes)

Feb. 05, 2024
Why Is Your Mini Fridge Not Cooling? (5 Potential Reasons)

Jan. 03, 2024
How to Fix Samsung Washer Error Code 4C

Dec. 11, 2023
How to Resolve UE Error Code on your LG Washer

Nov. 06, 2023
LG Washing Machine Error Codes: How to Fix Them

Oct. 02, 2023
How to Unlock LG Oven Door (After Self-Cleaning)

Sep. 08, 2023
How to Fix LG Washer DE Error Code

Jul. 31, 2023
Why Your Microwave Is Not Working

Jul. 19, 2023
The Quick Guide To Using a GE Self-Cleaning Oven

Jun. 13, 2023
How to Clean Your Dishwasher with Vinegar

May. 08, 2023
How to Fix a Noisy Refrigerator

Apr. 10, 2023
How to Remove Frost Build-up from the Freezer

Mar. 14, 2023
5 Ways To Clean Your Microwave Naturally

Feb. 01, 2023